V8 Differential Axle Rebuilding
The V8 differentials are built a good bit differently than the previous models. The side axles are housed in aluminum and screw into the diff. housing. This allows for the axle to effect the preload on the side axles as well as the side to side gear mesh. They are straight forward to rebuild but care must be taken as if any of the parts are damaged in the process, the axle is ruined. The first step is to remove it from the diff. There is a lock plate that must be removed as it holds the axle from turning. After removal, just unscrew the axle out of the diff. The threads are conventional direction. A spanner wrench makes the job easier but a large pair of channel locks will work, they will just leave a little scuffing. Once out of the car, place the axle into a suitable holder such as a drill press vise on your drill press. This could be done by hand but would be a bit more difficult.
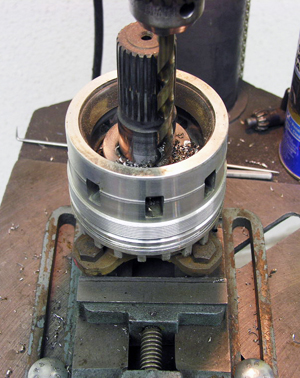
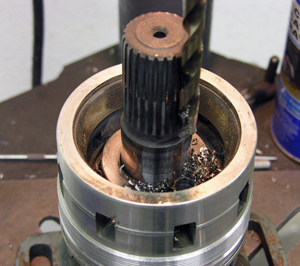
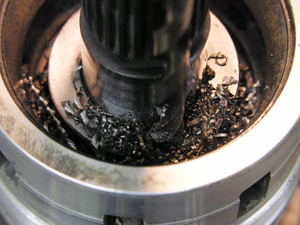
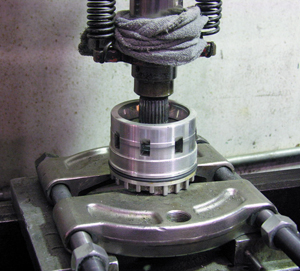
The next step is to drill a hole into the retainer. For this, choose a drill bit slightly smaller than the width of the spacer. Position the axle so that the drill will actually rub the edge of the axle shaft. Drill down through the retainer. When you reach the bottom, the drill will stop as the bearing has been reached and it is made of a very hard metal that your drill will probably not go through.
Now that you have drilled a hole, it is time to take a chisel and crack the retainer. The chisel should split the retainer so that you can lift it out stuck onto the retainer. . If it does not split, check to make sure that you have drilled all the way through the retainer.
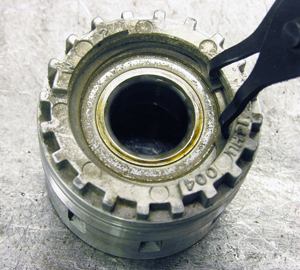
Now put the axle into a press and press the center axle out. Make sure you have it all positioned securely. It should press out without excessive force. Once out, take out the snap ring and the bearing should push out. A light tapping might be necessary. Note the position of the o-ring on the bearing housing for reassembly.
On the backside you will find a bearing race. If you are going to re use the race, then you can leave it in place. If you are going to replace it, then it will have to come out and now is the time. As you can see on the back side of the race, there is not a place to get a punch easily to remove the race. What works well is to put the assembly into an oven at 200 degrees or boiling water for at least 30 minutes. Remove and hold over a vise opened up to where just the edges of the assembly are sitting. Wear oven mitts and get a helper to punch the race out. A very light push or tap is all it should take to remove the race.
Once everything is apart, a good cleaning is in order. I usually bead blast the axle and housing. Tape off the bearing race if you left it in place and are going to re use it. The axle gets a coat of black paint and the housing is left natural aluminum. Also check the 4 axle bolts for straightness and thread damage. Chase them with a thread chaser if necessary. The thread count is 7/16x20.
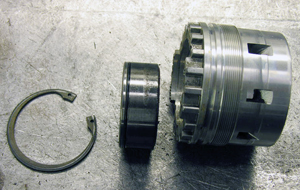
As far as reassembly is concerned, the bearing assembly has an o-ring on the outside. This o-ring should be positioned so that it is nearest the snap ring. Smear some grease on the inside of the aluminum housing where the bearing goes. Gently press the bearing into place with your fingers. If it does not go easily, check for burrs or corrosion. Once in place, put the snap ring back. It has a bevel on both sides so will go either way. Make sure it is seated in place.
Now the new race needs to be put back if the old one was removed earlier. This is a simple matter of pressing it into place. However, the race goes below the surface of the housing so it is a matter of finding something to press it in with. If you saved your old race, grind off some metal on the outside of the race so that it will
loosely fit in the housing. This can then be used to press the new bearing into place and then be easily removed.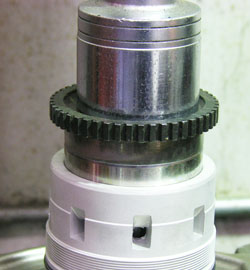
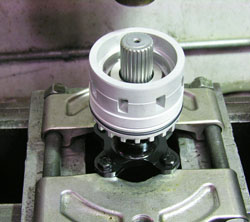
Now position the axle into a holder on the press and place the housing assembly onto the axle with the snap ring toward the bolt side. Place a new retainer onto the axle. You will need a pipe or dummy spacer to be able to press the bearing and retainer into place. Once pressed into place, remove from vise and install a new outside o-ring. You now have a rebuilt axle. A little grease on the outside o-ring and aluminum threads will make it easier to put back into the differential.
This bearing is a lot easier to put in place now rather than after the axle is back in the hole. The stack of items to the left is the housing on the bottom, the new race next, the old race above it with the edge ground down. The gear and socket are just there to push on the press with.
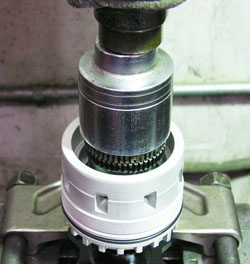
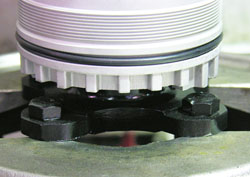
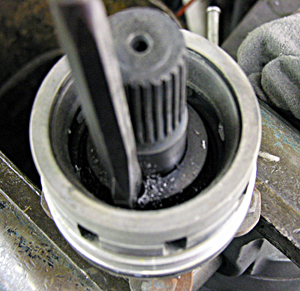
Now position the axle into the housing and position onto the press. Note that for picture taking purposes, I forgot to put the bearing race in first. Once in postion, use a spacer collar or deep socket or a combination to press the spacer and housing onto the axle. I took an old spacer collar and ground the inside until it slipped over the shaft loosley. The picture on the right above show how much clearance there should be once fully pressed. If you have more than that, keep pressing. After this, you should be ready to put back into the differential housing.